Showing posts with label DIY. Show all posts

IKEA HACK: Toddler Kitchen


My friend Brooke is super-mom and did the best IKEA hack I've seen in a while to the DUKTIG play kitchen. ISN'T IT ADORABLE??

Here's how she did in case you are motivated (unlike me, I want to buy one from her ;P)

"I just built the bottom part without the upper shelving and spray painted everything with two coats of primer first and then spray painted it all white. I spray painted all of the appliances with the primer as well and then metallic gold kyron spray paint (two coats). 

I then primed and spray pained the upper part with white as well. Used faux wood contact paper for the countertop. Assembled everything and then just hung some Home Depot wallpaper for the backdrop. Printed off a cow photo from Pinterest and called it good!"


Love it, Brooke! Thanks for sharing. 


What should I do with my globe?

A few months back Jason came back from the garage sale of neighbors who are clearly way cooler than we are with PF Flyers, a great leather jacket and an a vintage globe which has been living on top of our record player ever since.

I decided to do a little sleuthing and with the help of this globe guide, I discovered it was made sometime in the late 70's (Between French Somaliland becoming Djibouti in 1977 and Ellice Islands became Tuvalu in 1978). Don't laugh at me, we all know I'm a huge dork. No one should be surprised that I just spent 20 minutes searching a dusty globe for small counties and island nations that gained their independence in the 1970s. 

I do like how it looks as it is, but I've always wanted a way to mark the places we've been. Here are a few options I've seen, what do you think?

I love this light  idea. I could illuminate the places we've been and brighten up our room at the same time.


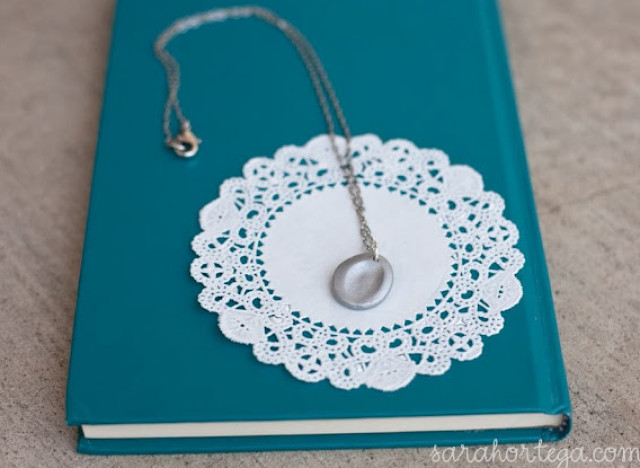
I could fingerprint the places we've been....

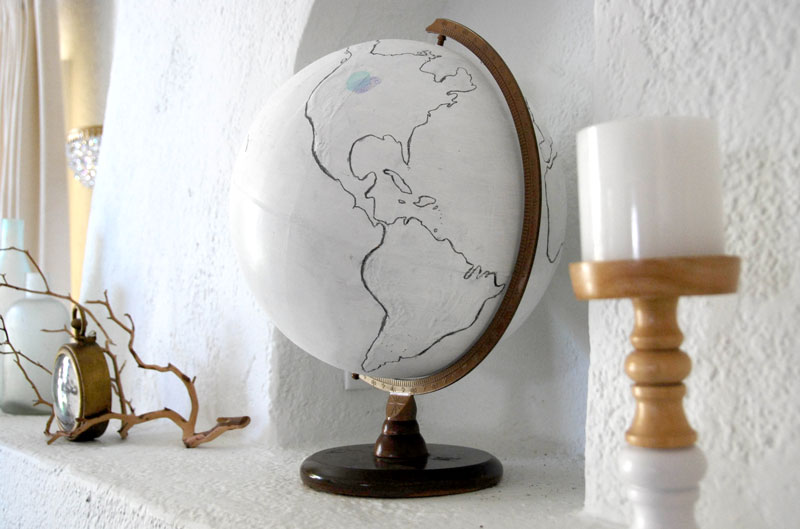
And I really like this partial chalk-board painted idea- you can still see the countries...


OR
If completely wreck it, I could just turn it into the Death Star and invest in one of these.  :)

DIY Kombucha


Look! I made this! 
(AND I drank it and haven't died!)

I'm a big fan of kombucha, but the idea of making something that's fermented was a little scary to me and rightfully so- the fermenting process goes against everything I've ever been taught about food safety and leaving things out, growing bacteria, etc. 

If you enjoyed science experiments as a kid, this is right up your alley. 

Basically, you make tea, add sugar, put it in a big jar with this sorta creepy looking bacteria/yeast blob that looks like a wet rubbery biscuit and let it sit on a shelf in your pantry for a few weeks. Added bonus, you can hide your favorite snacks behind it. It definitely detours husbands looking to eat all of the cookies :). 

I'm not going to pretend to be an expert by any means, so instead of telling you how to do it, I'll direct you to the experts that I've looked to:

First off, this post comparing the costs of buying kombucha  vs. making yoru own is what inspired me give it a go. 

I purchased the Goldfinch Kombucha Kit at Whole Foods. Their instructions were really straightforward and simple to follow. 

This had a bunch of helpful tips, photos and explanations as well. 

For my first round, I chose to keep the flavors simple, mainly because I wanted to make sure everything tasted right. I kept a few plain and added pommagranate juice to a few. I'm excited to try some of these suggestions in the future. 

Finally, I got my bottles from Bob's Homebrew Supply

I've already got my second batch fermenting in my pantry! SO I'd call this experiment a success! 

Project Pinterest: Dying Things...


Ever since the ombre curtains, I keep looking for things to dye. I'd forgotten how fast and easy it is to change the color on something and make it like new again.


So this week, my sister came over and we took some of her white things that were no longer white and turned them purple.

We didn't really have a plan when we started and were just aiming for something different than dingy white. So when the purple on this flag shirt wasn't dying as evenly as my sister wanted, we decided to go with it and we splashed bleach across the shirt after we dyed it. In the end, it think it was my favorite!

PS. If you're looking for more... precise dying tips, check out Lazy Saturday's post on dying clothes. 


Project Pinterest: Ombre Curtains


This week for my project inspired by Pinterest, I made ombre curtains for my bedroom.
We've all been pinning anything and everything ombre since, well, since pinterest began and this is my first attempt at actually making something ombre.

This started off as a DIY project based off of a tutorial from Rit Dye and this, which made it look so easy!

The moral of the story, it wasn't super easy and involved a lot of trial and error. I've decided that this is much more of an ART project rather than a CRAFT, if you get what I mean, I felt like I was painting or something.

Case in point: I started off mixing two different Rit Dyes as suggested on their color palate. I ended up adding more of one color and then another color entirely to my dye mix as the project progressed.

So while this isn't really a tutorial, keep reading, I do have some tips and tricks I learned along the way.

I started off slightly modifying Rit's instructions to work for curtains. First, I put my curtains on an old rod and rigged myself a little pulley system in order to try and dye them evenly. This worked and I'd recommend it. At the end of the dying process, I took the curtains off of the rod and quickly dunked the lightest part into the dye and immediately rinsed it out.


Please note the cat in the window staring intently at the craziness happening in the yard...

Rit's instructions end with throwing the project in the washing machine. Bad idea. Basically, when I took it out the dye had bleed and the whole thing was a fairly solid salmon pink (which was not at all the color I was aiming for) and you could hardly tell it was ombre. Oops.
So in comes my brilliant idea of using bleach....and it worked! I dunked the light end into a mixture of bleach and water and let the dark end sit in the dye for longer and basically spent the next few hours going back and forth between, "Oops, I bleached out too much color" and "Crap, now it's too dark".
Once I got it how I liked it, I rung it out and hung it on a ladder and sprayed it with a hose for a really long time, in leu of throwing it in the washing machine. I wanted to get out any excess dye and bleach without letting the colors run again.

And voilà...curtain success!

Other tips and tricks...
If you do end up with bleach on one end and dye on the other, throw the whole thing over top of a ladder letting the bleach rinse out and down one side and the dye down the other. 


I'd recommend doing this outside on a warm day, I was pretty soaked by the time I finished hosing everything down. There was a point when I looked down and realized I was standing in what looked to be a pool of blood. Thankfully, it was just a puddle of red dye run off, but none the less, I'm very glad I didn't attempt this inside.

Also, I knew I'd get dye/bleach on my clothes, so I just wore an old swimsuit and got dye all over myself and pretended like I was some sort of hippie artist, which I kind of was for the afternoon.


Project Pinterest: Chalkboard Lids for Mason Jars

One of my big summer projects is organizing my pantry and here's one little step of the process.


One of my larger summer "goals" is reorganizing my pantry. Yon know, getting rid of food that moved to this house with us 2 years ago and these sorts of things. I recently found chalkboard painted mason jars on Pinterest and thought they would be perfect for my pantry reorganization.  I tend to buy things in the bulk section and my pantry was cluttered with plastic bags with varying amounts of nuts and grains.
When I got the jars and was about to start painting, I realized that painting the lid might be better. Basically I started wondering what would happen if ran a jar with chalkboard paint through the dishwasher and started imagining chalkboard paint all over all of my other dishes...
So painting lids it was! It was super easy, I did 2 coats of paint and let them dry for a few days before using them.
I know some of you are probably wondering why someone would need a label on a clear jar. One time, I put dried quinoa on a salad thinking it was sesame seeds and fed it to a bunch of people.
Also, this way you can label expiration dates or other important info.

Project Pinterest: Faux Mercury Glass DIY

My sister, Stephanie, is throwing a bridal shower for a good friend in a few weeks. In looking for decor ideas she came across a few DIY mercury glass projects on pinterest and decided to give it a go.

After checking out a few different tutorials, she chose to go with this one from 17 Apart.  This is a super easy thing to do! And a really cheap option for getting some classy decorations fast for a party, or even a wedding. 
Stephanie picked up some glass votives from Goodwill and then we grabbed some random glass bottles and jars out of my pantry and went for it.

Basically, you mist the glass with a mixture of water and vinegar then spray it with Krylon Looking Glass Spray Paint.

After you spray it, you wait a minute (or a few seconds, if you're impatient like us) and then blot with a paper towel. That'll take off the paint that has been sprayed over the areas dotted with your water/vinegar mixture, giving you the mercury glass look. 

Repeat a few times, to get the desired effect, and there you have it, faux mercury glass!

DIY Slide Curtains

These unique and creative curtains caught my eye right away when I visited Patrick's Aunt Kathy in Tacoma last weekend. And she made them herself using old family slides! What a great way to repurpose something a lot of us having sitting around the house. Here's a similar tutorial I found over on Pinterest in case you're interested in giving it a try yourself.

Project Pinterest: DIY Workout T-Shirt

This DIY Workout t-shirt falls into my favorite category of DIY, it involves something that you already own and scissors.  No complicated trips to seven different craft stores in search for a specialty product, no trying to figure out how to use a sewing machine and hardly any cleanup!


First, I set up a little crafting area. It was such a nice afternoon I chose to enjoy a ginger beer and some nice music from Of Monsters and Men whilst cutting up my t-shirt on the porch. I chose a t shirt we had bought for Jason in Cambodia, only to realize that a Cambodian size large and American size large are two very different things.


Next, lots of cutting. Check out the tutorial for the specifics...I'm not a super even cutter, so there was a lot of recutting and fixing to make everything even. 

Ta-Da! Here's the finished product. I really like how it turned out, although I feel like there might be some additional cutting done in the future to fully even it all out. 

Words of Wisdom:
-I might recommend starting off with a shirt you don't like as much, a practice shirt if you will, incase you mess up the first time around. 
-Cut small and then keep cutting if you need to.
-Use a 100% cotton shirt. The raw edges will roll up when you stretch it out which does wonders in hiding uneven cutting.

Have a lot of old t-shirts? Check out the t-shirt scarf DIY too!

Project Pinterest is going on all summer, each week I'm doing another project that I find there. Check out what I've done so far.


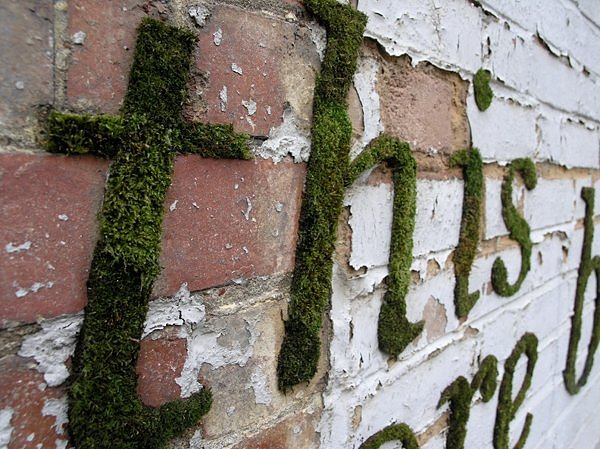
Project Pinterest: Moss Graffiti*

*I originally wanted to title this post "That Time I Put Dirt in My Food Processor", but in the end, I thought that the simpler and less threatening title of "Moss Graffiti might get more readers...

I've been wanting to try moss graffiti ever since the dead of winter when my sister first pinned it. Unfortunately moss doesn't really grow in January so I've bided my time, and last weekend my sister and I went for it. 
After checking out a few different "recipes" for mixing up moss, I went with this one from Apartment Therapy. Why? Because it seemed the simplest and only involved a quick walk to Whole Foods for buttermilk, everything else I had on hand: sugar, check; plethora of moss, check. 


They tell you to use a blender to mix up the moss mixture, I chose to use my food processor, mainly because I think it's easier to clean. 
For our first attempt, we chose to make a sort of chevron striped pattern on the back fence. Painting with this moss goop mixture isn't easy. 
So here it is, in all it's brown, not grown glory, seriously, it looks like someone painted mud onto my fence right now. Even though I've managed to kill every plant I've ever owned, I still have high hopes for this one! I'll be sure to let you know if anything sprouts. 


Project Pinterest: Homemade Sugar Scrub

Honey Oatmeal Brown Sugar Scrub: 
When I showed Teresa the picture above she said, 
"That looks like cookie dough!" 
And as you'll read the ingredient list, you'll see it practically is, 
you could probably add an egg and bake it at 350 and it wouldn't be half bad... 

It's time to exfoliate away all those dead skin cells and prepare for swimsuit season. So I decided to try something easy for my first Pinterest project and make a sugar scrub. This is something that's been on my Pinterest board since November when a friend suggested we make a bunch and give it out as Christmas gifts, needless to say, we never got around to it. 


Did you know you can make all sorts of all natural sugar scrubs with ingredients you already have in your pantry? 

Before we get any farther, I should probably just announce now, I am not good at following directions, a common thread you'll probably see throughout all my crafty attempts this summer. You see, when I started out to make sugar scrub I had every intention of following one recipe, but then another one looked good too. So I sort of created my own, a hybrid of the first two recipes on this list. 

Why attempt this scrub? Well, here are 6 reasons oatmeal is great for your skin and here's some info on the benefits of honey.  Instead of making a scrub with one or the other, I thought, why not both and this is what I came up with...

Honey Oatmeal Brown Sugar Scrub

1 C Oatmeal
1/2 C. Almonds 

1 c. Packed Brown Sugar
2/3 C Olive Oil
1/2 C Honey


First, blend the oatmeal and almonds in your food processor, then add the rest and let your food processor do the work for you. 
My scrub ended up a fairly thick consistency, which I was happy with, you can always add more honey or oil if need be. 


I tried it out and really liked it! I'm all about using natural products and this way you know exactly what you're putting on your body. I loved the way my skin felt after using it, not at all oily like in the past with store-bought sugar scrubs. 


Lesson Learned: Next time I might try it with white sugar instead...it might make it look more like a scrub and less like a trendy mason jar dessert. 


Enjoy!


Project Pinterest

Raise your hand if you, like me,  have a pinterest account that looks like your an ambitious DIY-er but in actuality, you've never sewn, hammered, or made your own necklace to replicate one that's $50 at JCrew.

This summer I'm attempting a rather ambitious project, Project Pinterest.


I've dabbled in different DIY projects before, successfully making this and this,  but it's time to get serious. Each week I'm tackling a new DIY project that I've found on Pinterest. I see it as a great way to learn some fun new skills, spruce up my house and yard and make some gifts for friends.


So join me, for my continuing summer series of projects as I force myself to become a DIY-er.


I'll be back tomorrow with the first one. Be excited.


DIY Mother's Day Gifts

Last week we featured some great Mother's Day gifts that you can buy, here are a few DIY gifts ideas from around the web for you crafty types!
My favorite: Fingerprint Necklace
Etched Glass (seems way easier than I thought!)


Kitty Quilt for Kenedee

I've been working on this quilt for my baby niece, Kenedee, who will be making her debut in the next couple of weeks. My sister-in-law Kasi and I both love cats so I was inspired by this wonderful vintage pattern originally done by Tammis Keefe that Michael Miller recently brought back into his line. This was my first quilting project since high school so it took me a little while to get back into the swing of things (hours trying to wind and insert the bobbin!) but I'm so glad that I got back behind the sewing machine. Special shout-out to the ladies at The Quilting Loft in Ballard who were so incredibly helpful and did a fabulous job with the circular quilt design. 


ps. A brief history of quilting, worth a read. 

Linking up here and here.


Doily Wreath


When I needed decorations for the vintage themed baby shower I threw a few months back, I was looking for all things old-fashioned and ended up stumbling upon TONS of things made from doilies on Pinterest.

I found this Martha Stewart doily wreath, which I LOVED. But then, I realized with the special supplies it called for, it was going to cost me over $100. Yikes. No thanks. So with that vision, I continued to scour Pinterest for other similar ideas and I came across this much simpler doily wreath.


In the end, I came up with my own creation, somewhat in the middle of the two. I used the technique from the second one, but added a lot more doilies than it calls for, shoving them a lot closer together.
Instead of using a metal frame as suggested in that tutorial, I used a straw one. When I realized I needed to wrap it in something and hadn't prepared for that, I whipped out a white sheet and tore it into strips, all the while pretending I was a WW1 nurse, caring for sick officers at Downton Abbey.

With the help of a couple of friends, we wrapped the straw wreath frame and proceeded to take a couple of hours of scrunching and hot gluing doilies. I recommend doing this with the friend for the entertainment alone.

When it was done, I used a bit more of the ripped sheet to make a bow to hang it from my picture rail.

Ta-Da! Doily Wreath success!

Make Your Own Lip Balm

My friend Daisy taught me how to make lip balm during our impromptu girls night last weekend. It's super easy and in the end, you have this wonderful product, nourishing for your lips, made with all natural ingredients.
Basically, it involves melting things in a pot, stirring them together, pouring it into little jars or tins and letting it set. Anyone can do it, really. Here's the recipe we used for Honey Mint Lip Balm.

Daisy purchased all the ingredients at Whole Foods, but found that they didn't sell large chunks of Bees Wax. It can be hard to find unless you're willing to make a trip to a specialty store. 100% bees wax candles are much easier to find, so we used those and took the wick out once the wax had melted. We used less peppermint than the recipe called for. Daisy used the full amount on her first attempt and equated it to dabbing Vick's Vapor Rub on your lips. Also, the recipe says to mix the honey in once you've taken it off the heat, but she found the honey was a bit clumpy that way. It is much easier to stir it in while the pot is still on the stove.


I'm now obsessed with my new lip balm. It works so well. It would be a really easy gift for a group of people. You could just make a large batch and put it in cute little jars. It would be a perfect party favor for a shower AND it's the type of thing that people think you're super cool and crafty for being able to make. You don't have to tell them it took you five minutes.