Showing posts with label recipes. Show all posts

Dutch Oven Bread

Rosanna here again! I'm in the midst of preparing for the National Stationery Show in New York. I'm super excited. We're less than three weeks away and I'm working super hard, preparing not only all our new greeting cards that will be debuting at the show, but all the promotional materials that go along with it, designing our booth, testing out the booth design, figuring out all the logistics for getting myself and Joel and all our product to New York in one piece. I found myself baking a loaf of bread the other day, and can only say that it must be stress-baking, because why else would I choose to add to my craziness : )

But really, this bread is not at all complicated. And it's beautiful. And it tastes even better than it looks. All it takes is some time, but you could even make this bread while working a full day. And it would make that full day of work so rewarding.

By no means am I an expert baker. If you can measure flour into a bowl and stir it with some water, you, too can make this bread. Baking requires some amount of recipe following, to be sure, but this recipe is dead simple.

DUTCH OVEN BREAD
recipe

ingredients
1 package dry active yeast (or 2 1/4 tsp from a jar of yeast)
1 1/2 C warm water
3 cups bread flour
1 1/2 tsp salt

Mix the yeast and the warm water together.
Add in the flour and the salt (in that order!) and stir together until a shaggy ball forms.
Cover with plastic wrap and place the bowl in a warm place and let rise for 6 hours (or overnight, or while you're at work for the day).


When you're ready to deal with the bread again (min 6 hours), dust a surface with flour and put the dough on the board. Carefully shape the mass into a roundish ballish shape. (Don't knead the bread, handle it as little as possible. BUT! if the dough seems suuuper sticky, carefully mix in some flour by folding the dough over on itself a couple times.)


 Place it on a piece of parchment, cover with a towel and let rise for another 1-1 1/2 hours. 

Preheat your oven and your dutch oven at 450 degrees. When both are nice and hot, carefully remove the dutch oven from the oven. Place the dough ball + parchment paper in the hot dutch oven. With a sharp knife, cut some slits in the top of the dough ball. Put the lid on the dutch oven and stick it in the oven for 20 minutes.


After 20 minutes, carefully remove the lid from the dutch oven and continue baking for another 15 minutes.

Carefully remove the bread from the oven and cool on a wire rack for 1 hour. 


(But seriously, I can never wait that long. Who can resist fresh bread!)


Enjoy! 

Gluten-Free Fall Baking

I get as excited about fall as the next girl, but being gluten-free can be a bit of downer when it comes to fall baked treats. It seems like every other Pinterest post and Facebook update these days is about pumpkin bread (my favorite). I've been gluten free for about a year now and have yet to bring myself to buy xanthum gum and five types of gluten free flours to master most (complex) gluten free baking recipes. I may take the plunge at some point but for now I'm going to stick to trying relatively simple recipes like those I listed below. I'll let you know how it goes!


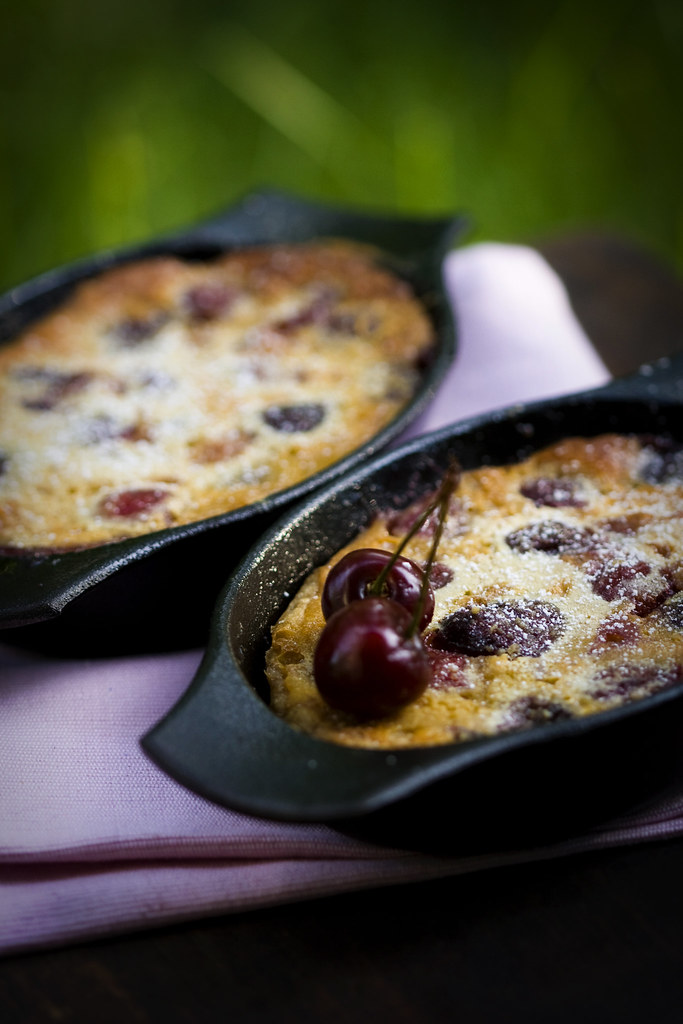
Almond Flour Clafoutis


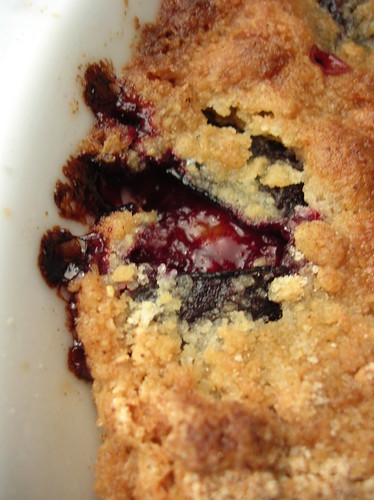
GF Plum Crumble


Pumpkin Corn Muffins 

Homemade Granola


A few years back I learned that homemade granola is SO much better than the stuff you buy at the store. Have you ever tried making it before? It's actually super easy. 

The other biggest benefit- you know what you're putting in it. So that means, you can flavor it however you like, add extra healthy things and you can also control how much fat and sugar goes in. 

I started out with this Nigella Lawson recipe adapted by Orangette. And have tweaked it a bit on my own. This is what I did this time: 

Dry ingredients:
5 cups rolled oats
3 cups raw almonds
1 cup hulled raw sunflower seeds
¾ cup chia seeds
2 tsp. ground cinnamon
1 tsp. ground ginger
1 tsp. salt

Wet ingredients:
¾ cup unsweetened apple sauce
1/3 cup brown rice syrup
¼ cup honey
2 Tbsp. canola oil

Preheat the oven to 300°F.
In a large bowl, combine all of the dry ingredients. Stir to mix well. In a small bowl, combine all of the wet ingredients. Stir to mix well. Pour the wet ingredients over the dry ones, and stir well. (Sometimes I'm lazy and just throw the wet ingredients on top of the try and have found if you're willing to get your hands a little dirty, you can mix it up just fine without having to dirty another bowl!)
Spread the mixture evenly on two rimmed baking sheets. Bake for 35 to 40 minutes, or until evenly golden brown. Set a timer to go off every ten minutes & stir it around. When it’s ready, remove the pans from the oven, stir well – this will keep it from cooling into a hard, solid sheet – and set aside to cool. The finished granola may still feel slightly soft when it comes out of the oven, but it will crisp as it cools.

Scoop cooled granola into to a large zipper-lock plastic bag or other airtight container. Store in the refrigerator indefinitely.

Also, I love to give granola as gifts! This time, I used these mason jars. 

An Ombre Birthday Cake


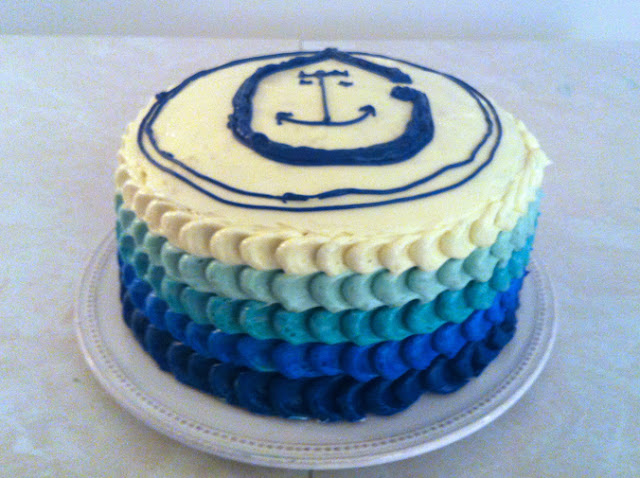
Isn't this cake awesome?! Even the inside is ombre! Our friend Rosanna, who lives in LA, made it and we thought it was so cool we asked to put it up on the blog. 
Here's a little blurb from her on how it came about:
The cake was for my friend and surfing buddy's birthday. The design on the top of the cake is the logo for our surf club. If it had been less than 102 degrees in my house as I was frosting the cake, I perhaps could have drawn the logo better than a two year old, but as it was 102 degrees in my house, this will have to do : ) The cake is an almond cake, and the frosting is an Almond Swiss Buttercream frosting. Super tasty together. Yay for cakes inspired by the ocean!


Huckleberry Pie


While at Priest Lake last week, I assisted Laura in a mountain-to-table huckleberry pie adventure.
First, we pretended we were pioneers and went up a mountain and deep into the woods on a quest for huckleberries. It was a bit harder of a task than we had imagined as it seems that bears have been doing a pretty good job of eating the berries and we were left scavenging for a few berries per bush. (Thanks to Scott, and the newly engaged couple for helping us pick!)

The final results were well worth all the scratches and that scary moment in which we thought elk were about to trample us.

Keeping it as old school as possible, the recipe came out of a cookbook that looks like this.

Huckleberry Pie
adapted from Gooseberry Pie, Better Homes & Gardens 1982 addition

4c Huckleberries
1c Sugar
2t Lemon Zest
1/4c Flour

1 recipe pastry for double crust pie... Smitten Kitchen's is my favorite 

Roll out and line 9 inch pie pan with half of the pastry.
In a large bowl, combine sugar and flour. Stir in berries and lemon zest. Gently toss berries until coated.
Transfer berry mixture pastry-lined pie plate. Trip bottom to edge pie plate. Cut slits in remaining rolled out pastry (get creative like Laura did with the star & moon!) place on filling and seal edges.
If desired brush top with milk or egg whites and sprinkle with sugar. To prevent over browning, cover edges with foil.
Bake at 375 for 25 minutes. Cool on wire rack and ENJOY.

Gluten-Free Summer Appetizers

Jenny and I are getting ready to head out on vacation next week (!!!) for some lake-time R&R and I've been doing some research on fun appetizers to bring along (GF of course). Here are a few ideas from around the web, what looks good?

Fried Zuccinni Chips with Lime-Mint Dipping Sauce 


Bacon Wrapped Grilled Asparagus w/ Spicy Dipping Sauce


Hot Spinach Dip - w/GF bread!


Smoked Salmon Dip

Avocado, Goat Cheese and Prosciutto Wraps


Figs with Soft Cheese (Brie) and Balsamic, YES:

Sushi Party!


Last weekend we got together with Patrick's side of the family to celebrate summer birthdays and Father's Day with a sushi party! P's aunt and uncle are really creative and put together sushi making stations so we could all try rolling it on our own. I love sushi but had never thought of attempting to make it myself before. What a blast! The photo above is my final product, a tuna-avocado-cucumber roll. 

Patrick's youngest cousin Matthew tried sushi for the very first time (he wasn't so sure if he liked it, as you can see by his hilarious reaction). 


Tiffany and Whitney, our sushi rolling experts and instructors-- Tiff even fried up some shrimp for us to include in some of the rolls!

Here's a quick demo from Whitney with step by step photos on how we rolled the sushi. 
1. Lay out the bamboo mat with cellophane wrap and then seaweed, place sticky rice in an even layer on the top half of the seaweed.
2. Flip over the seaweed so that the rice is on the bottom (and closest to your body), touching the cellophane. Add your desired "inside" ingredients to the top half of the seaweed (Whit used smoked salmon, avocado and carrots here).
3. Begin rolling the bamboo over the top of the inside ingredients and pulling tightly toward yourself.
4. Repeat this motion several times, clearing the cellophane from getting caught on the inside of the roll each time. Be sure to pack tightly and mold into a cylindrical shape as you go!
5. Using a serrated knife gently cut the sushi every 1" or so.
6. Remove cellophane and enjoy! 


Drink of the Month: Paloma Fresca

The Paloma is a delicious spin on the traditional Mexican margarita, very refreshing and great for warm summer nights. It was also relatively easy to make, just a lot of juicing. We adapted this tasty recipe from Dylan O'Brien of San Fran cocktail bar, Bloodhound. Jenny also made a fresh and tangy Grilled Chicken Corn Salad which went well with the Paloma. 


Ingredients: 2 oz tequila 
1 oz fresh-squeezed grapefruit juice 
.5 oz fresh-squeezed lime 
.5 oz agave syrup 
Soda water 

Make Ahead: Agave Syrup 
Will keep in the fridge for a few weeks. 
1. Add 1 cup of hot water to 1 cup of agave. 
2. Stir to dissolve the nectar and cool in the refrigerator. 


Kettle Corn!


Do you guys know how easy it is to make your own kettle corn? I bought a Whirley Pop a few years ago and now popcorn and kettle corn are my go to snacks. It's so easy to whip up quickly in case a bunch of people show up at your house out of the blue, which is something that happens often around here. And, as an added bonus, it's vegan, gluten free, dairy free, what's not to love?

I have a friend who makes kettle corn just in a pot on the stove, I wasn't ever talented enough to do that without burning it but this recipe works the same either way.

Kettle Corn
Adapted from Whirley Pop's Recipe Book

1/4 c. Vegetable Oil
1/2 c. Popcorn Kernels
1/3 c. sugar
1 tsp. salt

Heat the oil in the pot, somewhere between medium and high. Once it's heated, add the rest of the ingredients and cover. If you're using a Whirley Pop just turn the handle or if you're using a regular pot,  shake it every few seconds as the corn begins to pop. Once the popping slows way down, that means its done and you're ready to go!